Before you can lay a professional-quality dance floor, you need to address what's underneath it — and that starts with an honest look at your concrete subfloor. This guide walks you through every repair step, from initial assessment all the way to a surface that's ready for tiles.
Assess the Severity of Your Uneven Concrete Subfloor
Not all uneven concrete is created equal. A 2mm dip near a doorway is a very different problem from a 15mm slope running across an entire room, and the repair method you choose depends entirely on understanding what you're actually dealing with. Skipping this step is one of the most common — and costly — mistakes DIYers make.
Start with a long straightedge or spirit level. Place a 1.8m (6-foot) level at multiple points across the slab and note where gaps appear beneath it. The accepted industry tolerance for a dance floor subfloor is no more than 3mm variation over any 1.8m span. Anything beyond that will telegraph through your tiles, creating an unstable and potentially hazardous surface.
Look for these specific problem types as you work across the floor:
- High spots: Raised areas caused by heaving, aggregate pop-outs, or previous patching work
- Low spots and depressions: Often the result of shrinkage, settling, or wear
- Overall slope: A consistent grade across the slab, common in older construction or garage conversions
- Cracks and lips: Where one section of slab has shifted relative to another
Document everything with photos and rough measurements — you'll thank yourself later when choosing materials. It's worth remembering that even legendary architects grappled with the relationship between structure and level surfaces; the famous cantilevered concrete at Fallingwater is a reminder of how dramatically concrete can move and settle over time.
Once you've mapped your subfloor's problem areas, you'll have a clear picture of whether you need spot grinding, patching compound, or a full self-leveling overlay — all covered in the sections ahead.
Choose the Right Leveling Method for Your Floor
Not all uneven concrete subfloors require the same fix. The severity of the dip or rise, the total area involved, and whether you're dealing with isolated high spots or broad, gradual slopes will all determine which leveling approach gives you the best result before laying dance floor tiles.
Here are the most practical methods used for concrete subfloor leveling, and when each one makes sense:
- Self-leveling compound (SLC): The go-to solution for floors with multiple low spots or a general unevenness across a large area. You pour it, and it flows to fill gaps and settle flat under gravity. Most products correct irregularities up to around 25–50 mm in a single pour, making them well-suited for dance floor prep where a truly flat surface is non-negotiable.
- Concrete patching mortar: Better suited to isolated depressions, cracks, or damaged sections rather than widespread leveling. It's thicker than self-leveling compound and requires manual spreading and feathering, so it demands more labor to achieve a smooth result.
- Grinding down high spots: If your subfloor has raised ridges, hardened lumps, or lips at old control joints, grinding is often faster and cleaner than building up the surrounding area. A concrete angle grinder or floor grinder handles this well before any compound is applied.
- Combination approach: On floors with both high and low spots — which is common in older buildings — grind down the peaks first, then follow up with a self-leveling compound to bring the whole surface to a consistent plane.
Before committing to any method, use a long straightedge or laser level across the full subfloor area. Any deviation greater than 3 mm over a 1.8-metre span will likely cause dance floor tiles to flex, click joints to fail, or individual panels to rock underfoot. Identify exactly what you're working with, then match your method accordingly.
Apply Self-Leveling Compound for a Smooth Surface
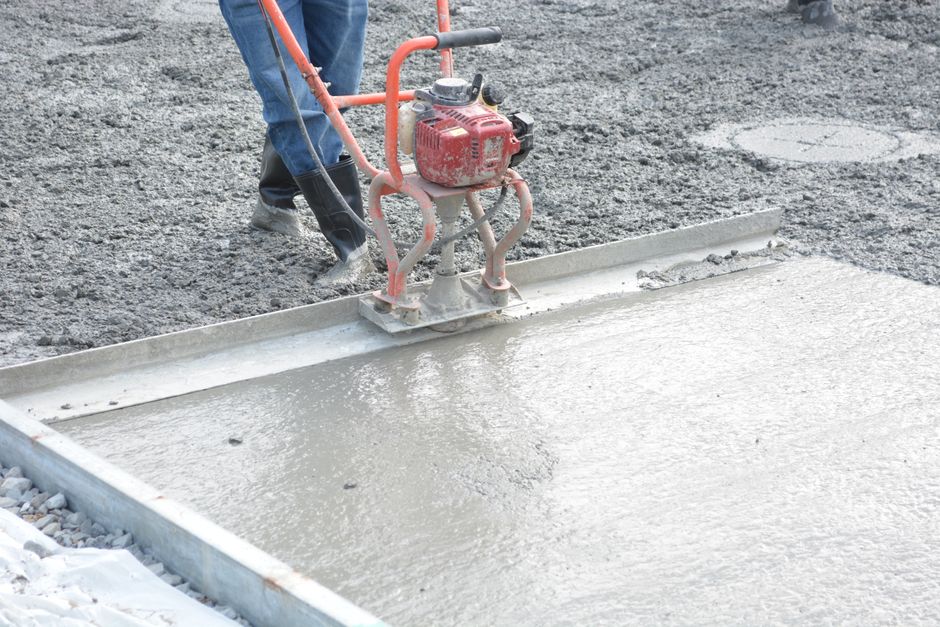
Once your subfloor has been cleaned, patched, and primed, self-leveling compound is your most powerful tool for eliminating the remaining undulations that would otherwise telegraph through your dance floor tiles. Unlike traditional concrete repair mortars, self-leveling compound flows into low spots under its own weight, producing a flat, hard surface with minimal effort — and a consistent base that keeps tiles from rocking, cracking, or separating at the seams.
Here's how to apply it correctly:
- Mix to the right consistency. Follow the manufacturer's water-to-powder ratio precisely. Too much water weakens the finished surface; too little prevents proper flow. Aim for a smooth, pourable batter-like texture.
- Work quickly. Most self-leveling compounds have a working window of 15–20 minutes. Have your tools, buckets, and mixing drill ready before you open the bag.
- Pour in sections. Start at the lowest point of the floor and work toward a doorway or exit. Use a gauge rake or spreader to guide the compound into corners — it won't always reach tight edges on its own.
- Check your depth. For dance floor applications, a pour between 3mm and 10mm is typically sufficient. If your floor has deeper depressions, consult our Pouring & Thickness guide for layering advice, since most compounds have a maximum single-pour depth.
- Allow full cure time. Light foot traffic is usually safe after 4–6 hours, but tile installation should wait at least 24 hours — longer in humid conditions.
One common mistake is skipping the primer coat before pouring. Primer seals the existing concrete, preventing it from absorbing moisture out of the compound too quickly, which causes cracking and weak adhesion. For broader guidance on surface prep and resurfacing techniques, the Repair & Resurfacing section covers everything from bonding agents to overlay compatibility.
A properly leveled compound layer gives your dance tiles a stable, professional-grade foundation — one that handles the repetitive impact and lateral stress of dancing without shifting.
Sand and Grind Down High Spots and Ridges
Once you've identified the high spots across your subfloor using a straightedge or level, the next step is removing them mechanically. Unlike low spots — which you fill — high spots and ridges must be physically abraded down to create a truly flat plane. Skipping this step and simply laying tiles over bumps will cause rocking, uneven wear, and potential cracking in your dance floor surface.
For most residential and light commercial jobs, you have two practical options:
- Angle grinder with a diamond cup wheel: Best for localised high spots, trowel ridges, and hardened splatter. It gives you precise control over small areas and is easy to manoeuvre in tight spaces.
- Floor grinder (walk-behind): The right choice when you're dealing with widespread unevenness, large ridges, or a subfloor that has multiple problem zones. Rental units are widely available from concrete supply and equipment hire outlets.
Work methodically across the floor, re-checking with your straightedge frequently. The goal is to bring high points down to match the surrounding surface level — not to grind the entire slab. Over-grinding weakens the concrete and creates unnecessary dust.
Dust control matters here. Concrete grinding produces fine silica dust, which is a serious respiratory hazard. Always use a grinder fitted with a vacuum shroud or dust extraction attachment, and wear a properly rated P2 or N95 respirator. Seal off doorways to other rooms before you start.
After grinding, run your straightedge across the treated areas one more time. Any remaining deviation greater than 3mm over a 1.8-metre span will still cause problems under dance floor tiles, so take your time and get it right before moving to the next stage of the repair process.
Test and Verify the Floor Is Ready for Dance Tiles
Before you lay a single dance floor tile, verification is essential. Skipping this step risks wasting materials and undoing all the repair work you've just completed. Concrete that looks flat to the eye can still hide subtle dips, soft spots, or moisture problems that will compromise your installation.
Use these practical checks to confirm your subfloor is genuinely ready:
- Flatness check: Drag a long straightedge or spirit level — ideally 6 feet or longer — across the entire surface in multiple directions. Any gap greater than 3/16 of an inch over a 10-foot span needs another pass of self-levelling compound before you proceed.
- Hardness test: Scratch the repaired areas firmly with a nail or key. The surface should resist scratching cleanly. If it powders or crumbles easily, the compound hasn't cured fully — allow more drying time before testing again.
- Moisture test: Tape a 12-by-12-inch sheet of plastic film flat to the concrete and leave it for 24 hours. If condensation forms underneath, moisture vapour transmission is too high. Address this with a moisture-barrier primer before installing tiles, otherwise adhesives will fail prematurely.
- Bond integrity: Tap across patched areas with a coin or hollow-sounding tool. A dull, solid thud confirms good adhesion. A hollow ring indicates a delaminated patch that must be removed and reapplied.
- Cleanliness: Sweep and vacuum thoroughly. Even fine dust prevents tiles from bonding correctly.
Only once every check passes should you open your tile packaging and begin installation. Document your results — a quick photo of your straightedge readings is useful if any warranty questions arise later.
Fixing an uneven concrete subfloor before installing dance floor tiles demands patience at every stage, but the payoff is a surface that performs safely and lasts for years. Work methodically through each repair step, let materials cure fully, and always verify before you install — that disciplined approach is what separates a professional-quality result from one that fails under the first night of footwork.